
Here are the surface pattern design basics that every aspiring surface pattern designer needs to know..
The topic of surface pattern design is a bit obscure.. So nichey that if you ask a random anyone, “what is surface pattern design?” they will likely be genuinely confused.
But if you’re a traditional artist, graphic designer, illustrator or licensing artist, the world of surface pattern design has likely crossed your path, and it’s a curious one to explore! So, what exactly is it?
Surface design, or surface pattern design translates to the designs you see on products. That sounds pretty vague, but honestly, it’s so broad. There are so many products dressed in different patterns. When you look around your home, take a stroll through Target, or shop for anything in the realm of clothing, home decor, baby clothing, toys, bedding – the list is endless – you will see so many patterns!
But… How do you get your patterns or placement art from your iPad onto a cute summer picnic set for release next summer?
It’s. a. process. And not one for anyone seeking a ‘lazy job.’ This is a whole-a$$ creative adventure, and it requires a lot of commitment and dedication to make pattern collections that are then licensed. It starts with the original art making process, whether that’s on an iPad or sketchpad, and goes through a process of digitizing, vectorizing and coloring.
This article covers some basic terms you’ll want to know, along with some insight on the process of creating art that goes through a process to become commercially ready to pitch in your portfolio.
This is just an overview, but I encourage anyone trying to navigate the surface design landscape to find some paid or free surface design courses and really go deep. You will see some patterns emerge (so punny) and your own way forward will become much more clear. Plus it’s always a bonus to connect with a creative community as you learn new creative things. There are some amazing classes on Skillshare, in addition to tons of free content on Youtube from pattern designers who are eager to help others navigate this unusual creative journey.
Below, I’ll list four important basics you’ll want to know now that your heart has led you into the magical realm of surface pattern design.
1. You’ll need to understand the terminology of surface pattern design
Surface pattern design:
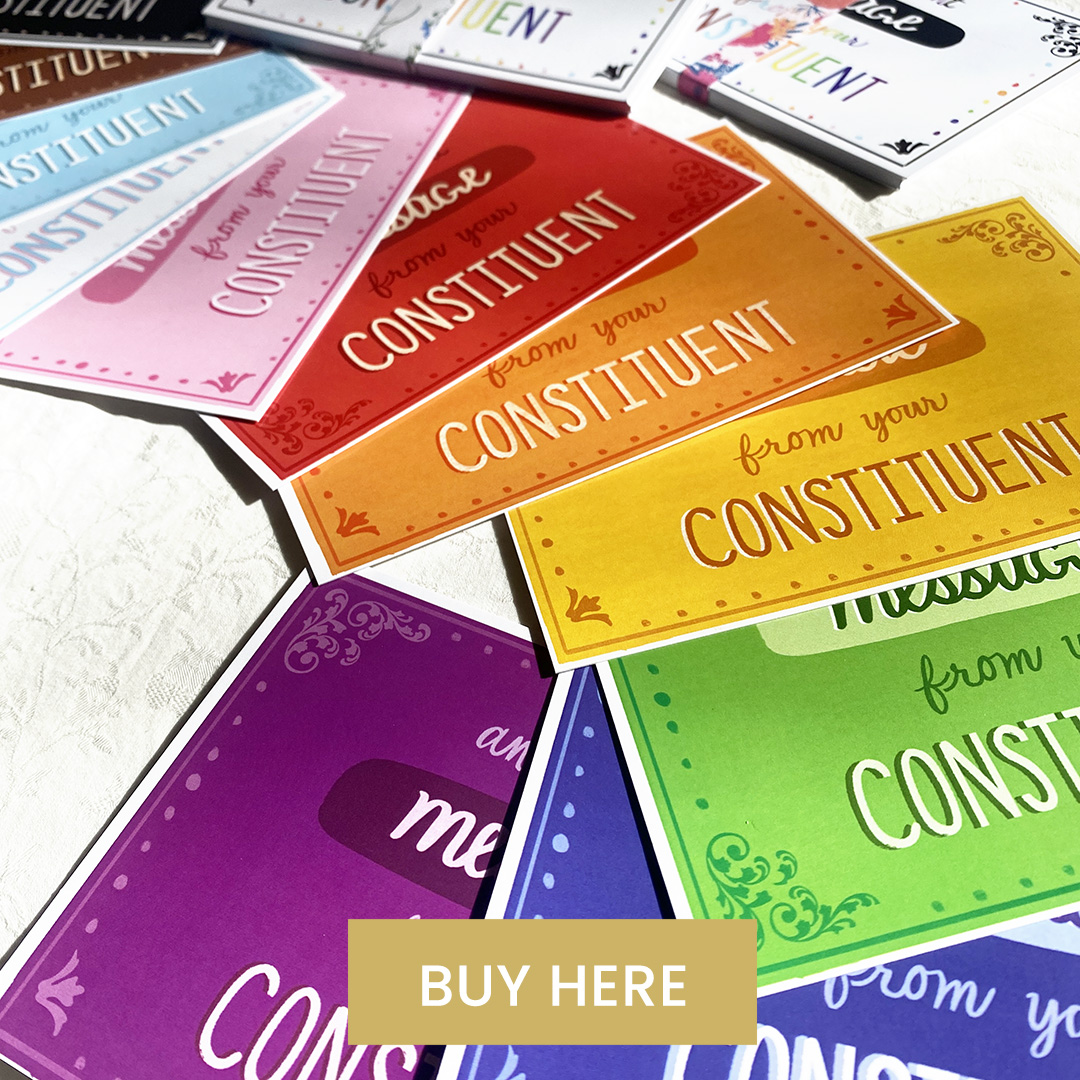
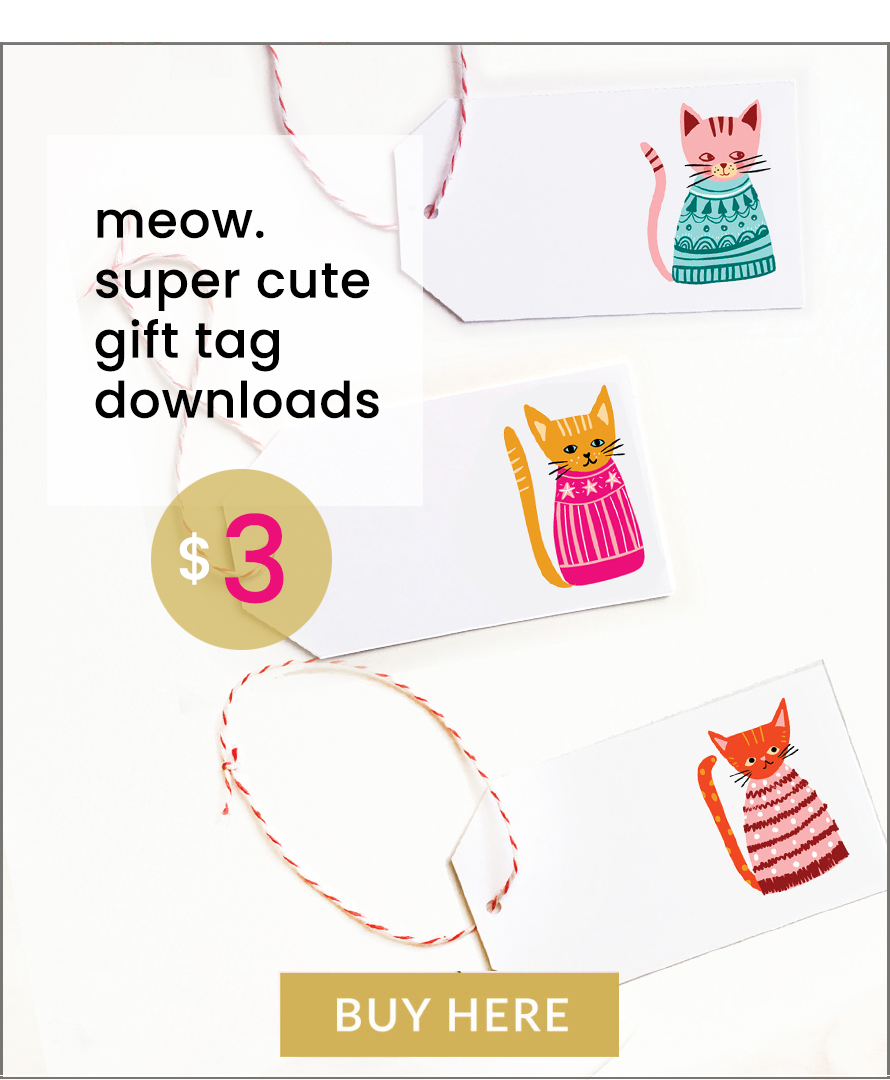
Surface Pattern Design is the act of creating art for the surfaces of mass-manufactured products. As the name suggests, in its most true form, surface pattern design is primarily artwork that repeats in a pattern. For example, wallpaper, wrapping paper, upholstery, quilting fabric, apparel fabric, and floor coverings.
… Definition by Elizabeth Silver
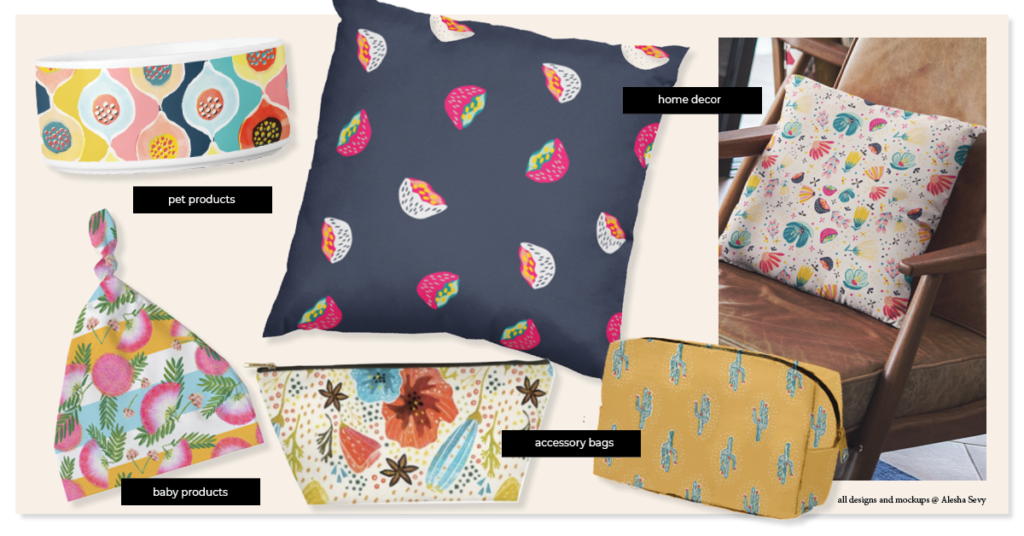
This image shows just a sampling of products that license artwork from pattern designers like you.
There are so many types of surface surface design, and it is quite different from other types of graphic design and illustration – but you also utilize your graphic design and illustration skills really heavily, so they’re not totally unrelated. If you’re ready to embark on the journey of the relentless pursuit of seeing your art on products out in the wild, you’ll need to know some basic info.
Below is a list of surface pattern design terms that will set you up for quicker understanding and success:
Surface design collection:
A group of patterns, placement art, or illustrations created as a collection; surface design collections are often made up of 1/3 hero prints, 1/3 coordinating patterns, and 1/3 blender patterns . A full collection is between 10 – 12 patterns, but you can put a smaller collection together and call it a mini-collection. That would typically consist of 6 – 10 pieces.
Blender patterns:
Blender patterns will make up the simplest patterns in your collection. Surface designers often refer to these patterns as the place where eyes can to to rest. Blender prints may be a solid color, they may have smaller more subtle motifs like little polka dots or subtle stripes, and they may have tiny ditsy patterns in a limited palette. Though they may not require as much detail and spacial awareness as hero or coordinating patterns demand, blenders are really important to collections.
Coordinating patterns:
These patterns may have a smaller color range, they may just take a few elements from your hero print, or there may be entirely new motifs that don’t show up in your hero print, but complement it well in your coordinating pattern. These patterns are simpler, but still carry a lot of weight in the collection.
Hero patterns:
These are your heroes – the patterns that have allll the fun things from your collection. If you’re designing a floral pattern collection, your hero prints will look like the stars of the show – bigger blooms, the widest color palette range, maybe combined with a scatter of the elements that will also show up in the coordinating and blender prints. These are the patterns you see that draw you in and create that thrilling and inspiring, “ohhhhhh.” You know the one.
Licensing artist:
Alicensing artist creates art (usually in collections) that is then “licensed” to companies to use on their products for a specified period of time, in a specific location for an agreed upon price, which is negotiated and made official with a licensing contract. Licensing artists most often make royalties on their art, and sometimes also receive an upfront fee for use of their art collections. You can think of art licensing like “renting” your art out. Based on the terms of your licensing contract, you may be able to license the same artwork to multiple companies at the same time.
Pattern art vs Placement art:
A pattern is a design that repeats and often covers a larger surface area. Placement art often refers to a stand-alone design that is featured in some way: on the front of a mug, the front of a gift bag, or a yard flag, etc.
Repeat patterns:
A visual pattern that repeats itself from left to right, up and down. Often seen on fabrics, wallpapers, upholstery and other forms of home decor.
Licensing contract:
An agreement between an artist and a company who wants to pay to license artwork. Licensing works differently in different countries and industries, so nearly every contract is custom created for each agreement. It’s always a good idea to have an attorney check your licensing contracts so that you know whether or not you can license the same piece of artwork in multiple industries or countries.
2. Designing in collections is your pathway to success
The surface pattern design industry is unfortunately not one that is spilling over with surface pattern design jobs. So if you’re serious about this career, it means designing collections and pitching those to potential buyers for licensing (I’ll write more about art licensing in future posts). I’ve admittedly designed a few collections and have yet to license my artwork. But some fine day, after I’ve pitched a few consistent pitches, I’ll bring the celebration right here…
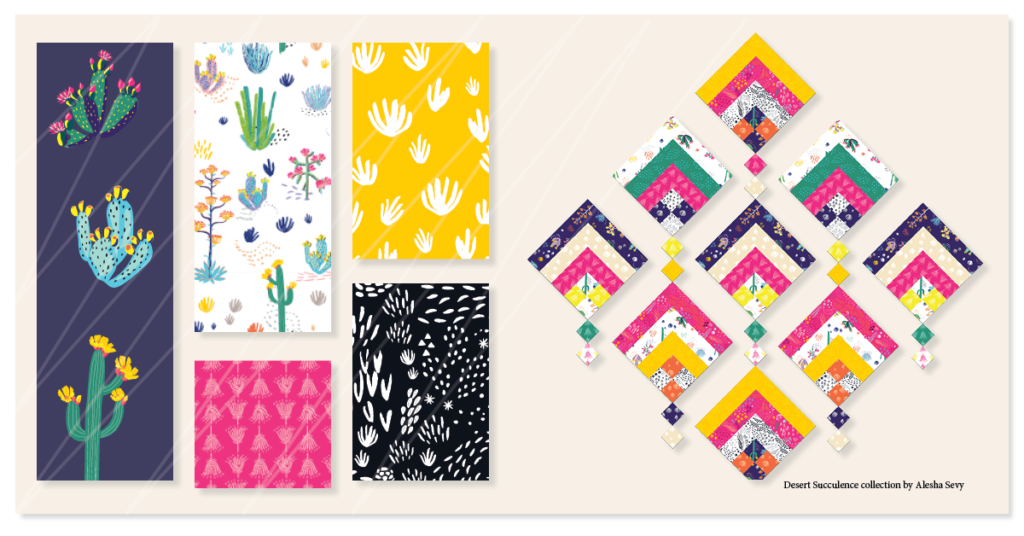
Until then, I’ll share what I do know about designing collections. This is where your creative intuition + your own personal stories + important technical design skills = a pattern collection that you can feel proud of and ready to pitch. Below is a sample of a desert collection I designed. 🌵
Here are a few tips to remember as you design your collection:
Tell a story in each collection:
The most successful and heartfelt collections really do tell a story. No matter which successful surface designer you ask, the advice is consistent because it speaks to the hearts of those buying the product or fabric: design your collection around an anchor point – a story that people can relate to and remember – something that means something to you, and allows you to ground into that story as you vision your pieces.
The story of your collection will drive your design – the color palette, your design process, the individual patterns you create to tell the story… I recently saw that fellow surface pattern designer Ashley Paggi offered a sneak peak into the coming release of her Front Porch fabric collection, and the simplicity of this name shows how simple your story can be. This is literally a collection she created from making art on her front porch, a place that is meaningful to her and her family. If it’s meaningful to you, you will be more successful in conveying that sentiment to others through your design.
Build your collection from three pattern types:
Hero prints, coordinates, and blenders. A good rule of thumb is to designate a third of your patterns to be hero prints, a third of your patterns to be coordinating prints and a third of your patterns to be blender prints. Although it’s also common to see a slightly smaller number of hero prints if the pattern is very ornate..
If you imagine a patchwork quilt, it makes sense that not all of the patches would be as busy and ornate as hero prints. We need to see some variation in the size of motifs, the busy-ness of the designs, the color palette, etc. – or the quilt will feel really overwhelming to look at.
Learning how to make repeat patterns is essential to building your collections:
This one is a bit technical but so important. Though there are ways to use stand alone art, or “placement art” in your collections, chances are you will need to offer fully repeating patterns also. There are a few different ways of learning this surface design technique, and I’ve found some teachers who shared some really useful tools.
If you want to learn how to create repeating patterns in illustrator, I would recommend learning from Bonnie Christine. If you want to learn how to make a repeat pattern in Photoshop, I learned some handy things from Lauren Lesley, along with some Photoshop actions to speed up the workflow.
Below is a simple way to envision how to create a repeat pattern by hand:
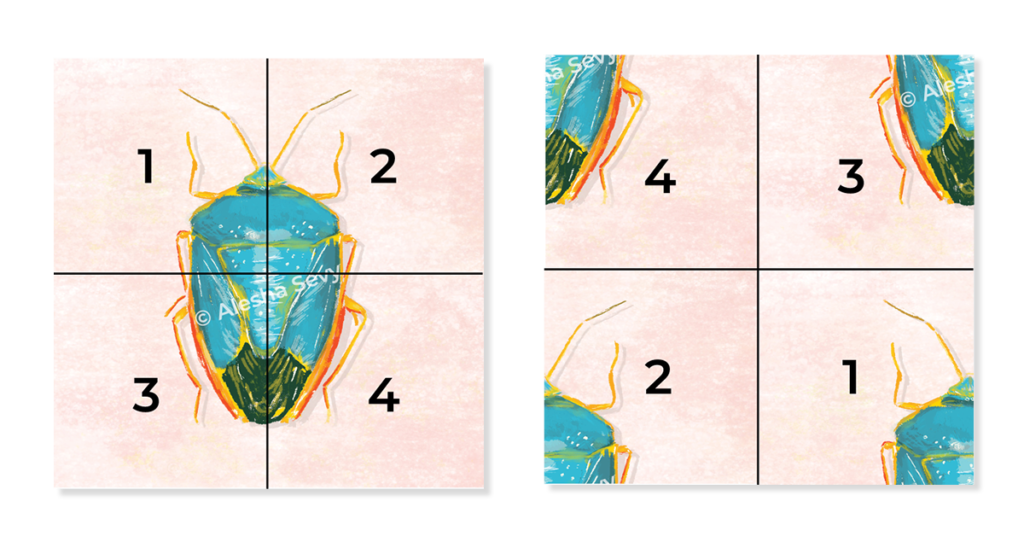
In this method, you divide your canvas into fourths (see left photo), and then rearrange the order (see right photo). When the artwork is tiled next to each other, you can see that the beetle is lined up in the example below (but not perfectly – that’s a little user error on my part and one of the joys of working with patterns). But for this example, I wanted to show how these tiles lined up to bring the beetle back together, so I outlined the top two squares:
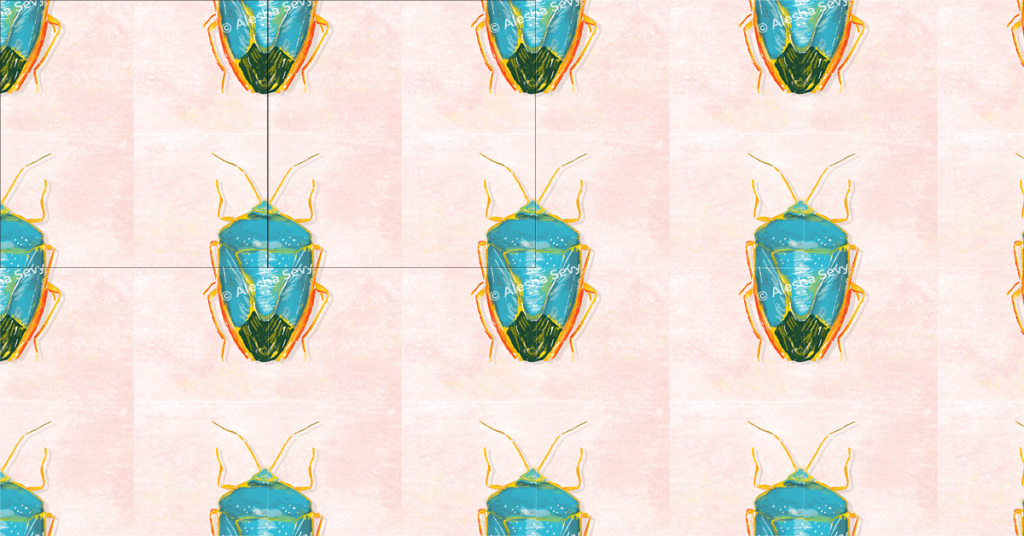
Note that I kept a background color that didn’t transfer seamlessly. I did that to show the original pattern squares – but there are definitely methods to keep your edges clean and seamless when you make a repeating pattern digitally, so that when the pieces do come together in repeating tiles, it is a true seamless repeat pattern.
3. Develop your own art process and create workflows that help you batch your work efficiently
If you’re still in the process of doing tons of practice as you find your art style, this is a great time to pay close attention to the ways you make your art, what you gravitate toward, what comes naturally to you and what you feel you could really enjoy.
Your art process may involve a lot of organic artistry, from gathering and scanning leaves, to drawing or painting your pattern motifs with traditional media. Or you may be a thriving digital illustrator creating vector artwork from start to finish. Many of us start with hand drawn illustrations or paintings, which then need to be digitized in order to make patterns and placement art.
The best advice I can offer is to try to get your original artwork as refined as you can before trying to digitize it. Clean lines, solid colors, cohesive composition. The more you refine your motifs when you create them originally, the less digital clean up work you’ll have to do later. It can be super tedious to clean up jagged edges around all of your line work.
If you are starting with traditional media, such as watercolor or colored pencils, a good scanner will be a great investment for you. There are so many to choose from, and you don’t need the top of the line scanner. This Canon scanner is an affordable choice, and gives good quality scans. Another option if you really can’t afford a scanner, is to use your phone camera if it’s high quality. Be sure to do this in bright but soft light, avoiding huge shadows and direct sun.
With both methods you’ll need to do a little photo editing once your images are on your computer, and this will require knowing some sort of photo editing software. Being sure to brighten your art, refine the colors, and get it prepared for vectorizing.
So, if you were documenting your art making process so you could create standard operating procedures and efficient workflows, a traditional art making method could follow this pathway:
- create original art using traditional media
- scan or photograph original art, and get those images into a photo editing software program like Photoshop, Canva, Lightroom, etc.
- clean up rough edges, refine color palette, and do any other photo and light editing in this program
- vectorize your cleaned up art motifs, re-color if necessary and group objects so you can move them around easily as you build your patterns
- build your repeat patterns and placement art pieces
Knowing all of these steps, you have the information you need to refine this process and get the most out of the time you already have to spend. Maybe that means doing larger batches of original work so you’re able to batch the scanning, editing and vectorizing in larger chunks so you’re not jumping around as much. Maybe you’ll decide you want to try out the Illustrator app on the iPad to see if you can still design in your own unique style but skip a few intermediate steps by designing in vectors from the start.
Your art process is yours to explore, so find your ways to be as efficient as you can.
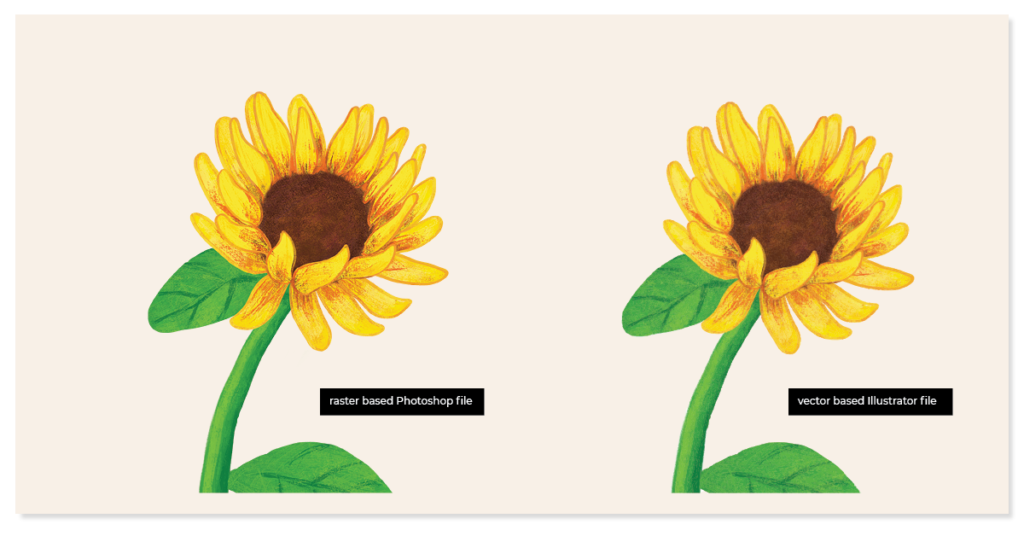
4. What about raster pattern collections? Why does my final collection need to be vector art?
This is a really good question because some of us do such awesome work in our raster based programs! I think so many illustrators would agree that the satisfaction that comes from the textures and layers and brushes available in Photoshop is just one of the most juicy and nourishing parts of illustrating (if that’s your style).
But alas, there are many licensing partners who won’t accept raster work. Vector art is scalable no matter what, so when you present collections in raster format, you’re cutting out a lot of potential licensing opportunities. It’s tempting to think that vectorizing means flattening your layered and textured details, but there are actually some ways we can do our favorite rich, raster-based, tactile work – and also vectorize it.
Below is an example of how you can take a really texture based piece of raster art (originally created in Photoshop) and vectorize it in Illustrator using the Image Trace feature. There are settings that help keep the integrity of the details, the texture and the layers of color – especially if you choose to vectorize your art in the same layers you created them in Photoshop. It all depends on how you want your end result to be and what steps you need to take to get there.
The worldwide industry standard for creating vector art is Adobe Illustrator. If you are unfamiliar with Illustrator, it’s a program you’ll want to start learning – and honestly, never stop. It’s also a program that can feel pretty daunting and frustrating – but it turns into your most powerful design friend once you get the hang of it. I highly recommend taking courses on YouTube, Skillshare, and from other pattern designers who teach specific surface design techniques in Adobe Illustrator.
One of the best teachers of how to use Illustrator in surface pattern design is Bonnie Christine. I’m sure you’ve come across Bonnie’s name if you’re serious about surface pattern design. She’s really found her pathway to success and is a fabulous teacher. I started off taking a few of her Skillshare classes years back on surface pattern design (where she teaches specifically how to digitize and vectorize organic elements), and eventually worked my way up to going through her Surface Pattern Immersion course earlier this year. It was a gift I gave myself at a particularly important part of my own journey.
Bonnie teaches some Illustrator techniques that were new to me, and I have been using Illustrator for the past 17 years! But even if you don’t yet have a command of Adobe Illustrator, start where you can, and learn all you can. This is not a sprint, it’s definitely a marathon. And you can do it 🙂
The truth that keeps resurfacing for me, is that there are a lot of steps when it comes to building a surface pattern design practice. But it’s a labor of love for those of us who can’t stop finding inspiration in everyday life and imagining it coming alive on the things surrounding us. And sometimes looking at this process from a distance can help us refine it, save some time and create quality art even more quickly.
Becoming a licensed surface pattern designer is the dream for a lot of us. Regardless of your pace (and trust me, I have been slowly noodling this along for quite a few years in my own margins of time), this is a really rewarding creative journey filled with some of the coolest people out there. Pattern geeks of allll ages and backgrounds find their way into the surface pattern design industry and wonder how they ever lived a full life before knowing about it.
This little corner of the design world is more fun with more friends, so if it intrigues you, I hope you’ll give yourself the chance to explore your design dreams and be a part of something that can feed your soul, scratch your creative itch, and pad your pocketbook.